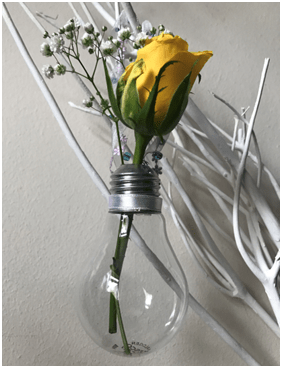
So this week I have had major post holiday blues! We had an absolutely incredible time in the Philippines, and I will be doing a post all about it in a couple of weeks. But in the mean time, I’m trying to fill my room with pretty flowers to keep me happy! And I love finding new and cute ways to display them. This week’s crafting follows on from last week’s theme of light bulbs. Here is how to make these lush hanging light bulb vases.
First up is to dismantle your light bulb. This can be messy and potentially dangerous as your dealing with small shards of glass. I recommend putting the light bulb in a box to collect all the shards, and wearing goggles and washing up gloves to protect your eyes and hands.

- I used a pair of side cutters to remove the initial pin.
- Then using some pliers I gradually started to break the black glass. This is quite thick glass, and make sure you hold the metal top of the light bulb not the glass dome as it’s easy to accidentally squeeze too hard and to break the dome glass.
- Next up you need to remove the glass that holds the filament in place. This again is quite thick. I used a screwdriver placing it on the thick glass and gently taping the end with a hammer. You have to be gentle but firm but watch out that when you free the filament, it doesn’t fall too quickly as it can smash the dome below! Remove enough of the glass so you have a smooth edge inside.
- Then finally using your pliers gently remove the remaining filament and then you have your empty light bulb.

As you can see it’s a little messy!
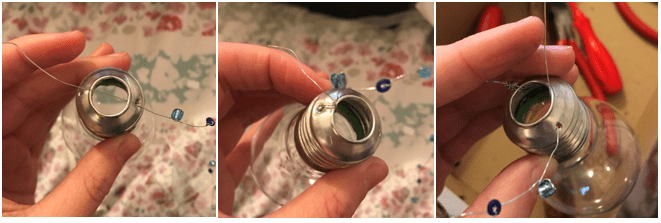
To make the holes, I carefully used a screwdriver to push through the metal part of the light bulb. I made a grove initially with the tip of the screwdriver, so it didn’t slip on the rounded surface. Again watch out for your eyes and hands as you pierce the metal.

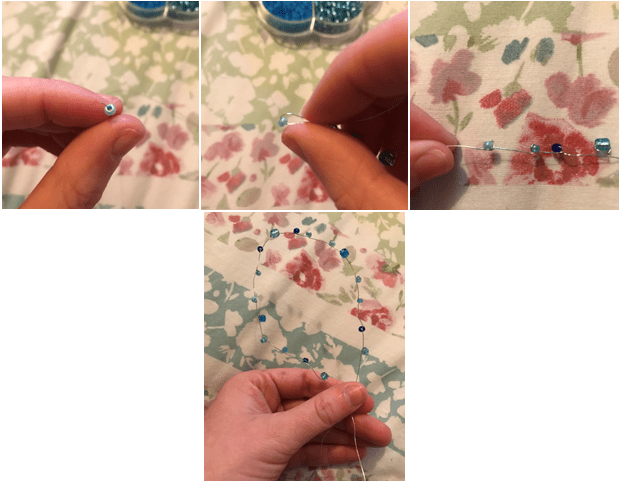
To make the hanging part I used some thin florists wire and threaded beads onto it at varying intervals. I twisted the wire around the beads so that they stay in place.
I then fed the wire through the holes and twisted it in on itself to secure. To add a little more decoration, I wrapped a thin piece of ribbon around the beaded wire and secured it to the back of the light bulb with my glue gun. To hide then bottom of the metal part of the light bulb, I used another thin piece of ribbon and secured it to the back of the bulb with my glue gun.

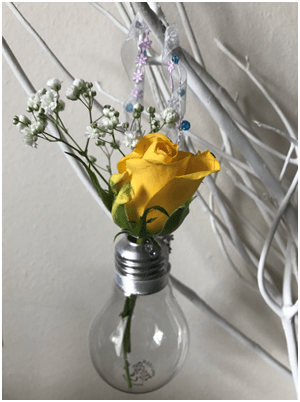
And there you have it, such a cute little way to display some happy little flowers!
All my love,
God Bless,
Mims
xXx