Tidy Tidy Tidy!

I have been having a good old clear out this week. It was well overdue and honestly it’s made me realise how much stuff I have acquired over the years! I have made a pile of bits for the charity shop, bits for my mum and sister (don’t think my dad would appreciate my old stuff!) and then I found a t-shirt that I use to love but It had gotten a little out of shape. So I decided to make it into a cushion! As you do! Here is how I got on.

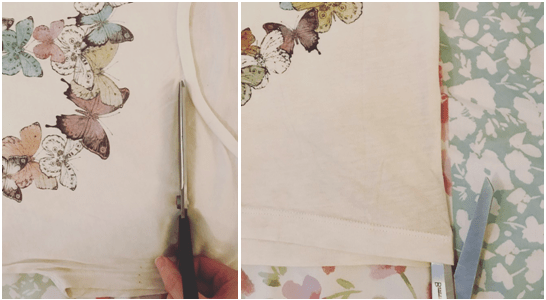
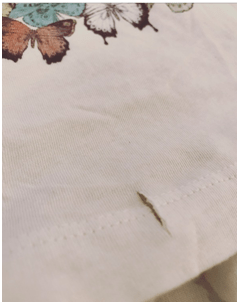
First up I used fabric scissors to cut along the neck line, and to also cut approximately 9cm up each side of the bottom of the t-shirt.

1

Then along the bottom of the back of the t-shirt I sewed 3 buttons, repeating the same process along the top seam of the back of the t-shirt.

2

On the opposite side I then made small cuts into the fabric ensuring that they lined up with the buttons, approximately half of the width of the button (as the material was quite stretchy), to act as the button holes.

3

I then fed the t-shirt over a cushion inner and did the buttons up. To close the corners, I tied the ends together in a loose knot.

4

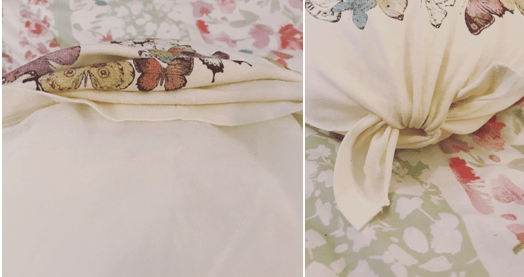
And there you have it! A super simple and easy way to hang onto your favourite old t-shirt designs!! And a free way to create some new scatter cushions.

6

All my love,


God Bless,

Mims

xXx

5

A Little Bit of Sparkle

So this week I have been struggling on the inspiration front so I decided to have a mini sort through some of my craft supplies to see if that would inspire me! I stumbled across some wooden letters I’d brought ages ago with a view to making presents for my friends. As I got creative today I found myself thinking how versatile this very simple craft could be. They’d be great for a wedding display or for a kids bedroom or even your own book case decoration. So here is all you need to know about how I decorated these letters. Hope you enjoy!

I brought these letters for £1.99 each off of Etsy, but you can also get them in Hobbycraft. Then you need to decide on how you want to decorate them. You can use ink, glitter, paint, buttons, gems, paper, fabric paper… the list is endless!

1

I decided to initially paint mine.

2

3

Once painted I then decided to cover the ‘&’ sign in glitter – as I’m a little obsessed with glitter! I mean all the cool kids are right?! I smothered the front side of the sign with Copydex glue before pouring some silver glitter over it and letting it dry. For the other letters I used some paper flower embellishments to create a lovely, simple and girlie display!

4

And it really is that simple!! I also made a H out of map paper which looks great next to my Heidi Swapp light box and decorated an E with buttons, but more about that project a little nearer to Christmas!!

5

All my love,6

God Bless,

Mims

xXx

Mad About Scrabble!

I am a lover of all things scrabble related! I guess that’s my inner geek coming through! So when I saw a picture of these adorable scrabble tile coasters on Pinterest! But I couldn’t find any tutorials of how to make them so I just made it up as I went along! For this week’s craft you will need wooden scrabble letters (you can buy these in packs on eBay for pretty cheap), thin cork coasters (again I got mine off of Amazon for not a lot), a glue gun, varnish and scissors.3

I’m a bit of a geek and keep all my letters in alphabetical order! First of all you need to start arranging 4 or 5 letter words that go together and match them into 4×4 or 5×5 blocks.4

Once you have your letters arranged, start to stick them onto the cork coaster using your glue gun. After the first row is in place, be sure to also glue the edge of each tile so that they all stay stuck together!1.1

Once finished, use some scissors to cut the coaster down to size.

2

To finish the coaster off, add a coat of varnish, like the one below. Make sure you follow the instructions on the canister you’re using and make sure you’re in a well ventilated room!5

Now all that’s left is to have your friends over and have a good old coffee and a chin wag!

6

All my love,7

God Bless,

Mims

xXx


Finding That Happy Place

One of the reasons I started this blog was to give me an outlet to help deal with the general stresses of life and work. I find a calmness and peace in crafting and creating, and since I’ve started this blog I really have noticed a difference in my ability to handle stress and deal with it outside of work. This week has been a little on the stressful side of life and so I thought I’d share with you one of my most favourite stress relievers. It’s a very simple craft and doesn’t take much explaining, but there is just something about it that brings an immediate sense of calm. Maybe it’s the focus on the mixing of the colours, and the patterns they create.

Untitled

For this you will need some paint brushes, some water to rinse them in, water colour paper so that the water doesn’t turn the paper soggy, and some ink (You can use water colour paints instead but they don’t have quite the same effect). I used Winsor & Newton Inks as they are readily available in WHSmiths.

6

Firstly decide on what you want to make or what word you’d like to create, for this I used the word ‘Love’. Then using clean water only, use the paint brush to draw the first letter. Using a finer paint brush, start adding droplets of ink over the water on the page and watch the colours spread out along the water line. Keep adding the ink, in different colours depending on your desired look, until the letter is fully formed. Then repeat the process for the rest of the letters and before leaving the page to dry.

7

8

10

It really is that simple! But the effect creates beautiful gift cards, bookmarks, wall pictures and anything else you can think of! And if you’re anything like me once you start you won’t be able to stop!

5

3

All my love,4

God Bless,

Mims

xXx