Fabric Photo Frames

Hello October! Well didn’t you sneak up on us pretty quickly! It’s been a little bit of a busy week but I am pleased to say that I have officially started my Christmas shopping! It is after all only 80 days until Christmas day (Eek)! So with that in mind I have been thinking about handmade present ideas. This weeks craft is how to upcycle an old photo frame.9.1

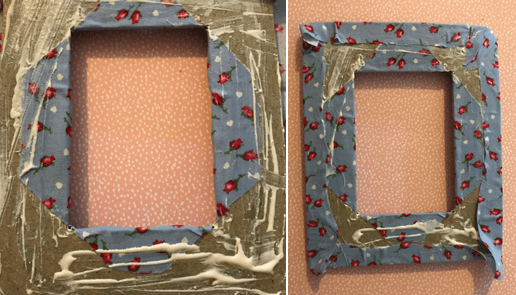
I brought this padded photo frame from a charity shop but the material is a little old and in need of a little update. This way you can change the photo frame to match your colour scheme or room. I started by separating the front of the padded frame from the back, this can be a little tough and can need a bit of gentle force to make it happen!

1

Once separated carefully remove the material from the foam padding.

2

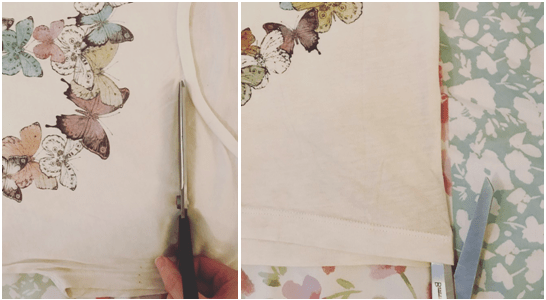
Then select a piece of fabric that you love and cut it to size – slightly larger that the padding. Draw around the central space within the frame.

3

Take the material and cut into the corners of the centre. Then start to glue the back of the padding. I used Copydex fabric glue.

4

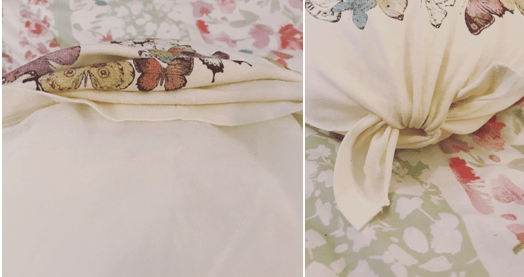
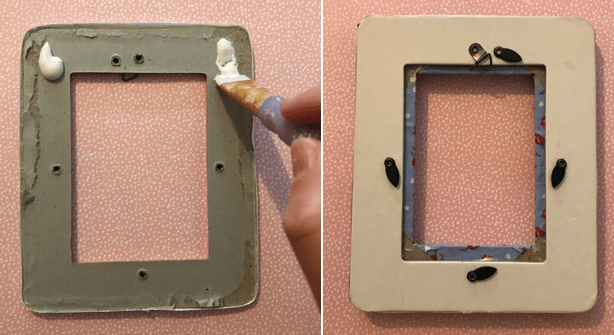
Starting with the inside of the frame start to fold the edges in and stick them down. When it comes to the corners leave them until last to stick down.

5

Having applied more glue underneath, then fold the corners over and stick them down.

6

Using the same glue, cover the frame backing before applying this to the back of the padding. Hold together until secure.

7

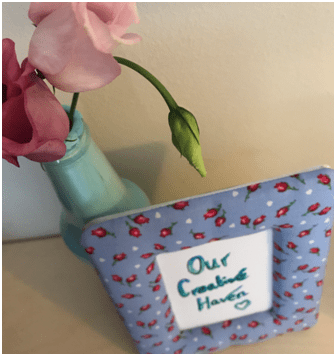
And there you have it! A super simple present idea!

8

All my love,9.1

God Bless,

Mims

xXx

10

Pretty Little Ears!

Bonjourno! Happy Friday everyone! I hope you have had a lovely week! 

I had the absolute pleasure of attending a dear friends wedding in Cyprus last Friday (hence no blog post last week)! It was so beautiful and I had the most amazing time dancing bare foot in the beach sand!


Here is a pic from the lush day! Aren’t they the most gorgeous couple!

10

I was feeling super summery in the sun and started thinking of these adorable earrings that I made my sister last summer and thought I’d share them with you. They are super simple to make too!

4

All you will need are some pretty flat backs, a glue gun and either blank earrings or hair clips.

Select the flat back designs that you want to use and use your glue gun to stick it to the blank earring. Then make sure to let the glue dry thoroughly before you start using the earrings.

And there you have it! It really is that simple and makes such cute little gifts! Hope you all have a lovely week!

All my love,

God Bless,

Mims

xXx


A Happy Little Upcycle

So last weekend was a whole heap of fun! Those of you who know me will know that other than crafting my other love is Obstacle Course Racing! I just love mud! And last weekend my usual OCR buddy Jo and I introduced some of our other friends to all the glorious mud that the Nuts Challenge offers! And it was pretty epic! They all absolutely smashed it!

Here are a few pics from the day…

1.1

Now in contrast from all that mud, this week’s craft is super pretty! I’ve been wanting to try this for a while and finally had a spare afternoon to give it a go. All you’ll need are some empty glass bottles or jars and some acrylic paint.

1

First of all give the bottles a good clean and if necessary give them a soak to remove all the sticky labels.

Then over something you don’t mind getting paint all over, pour some acrylic paint in the glass bottle, gradually swirling the paint around the bottle, until the entire inner surface is covered. Then turn the bottle upside down and allow to drain. I have learnt today that you need a lot less paint than you think you do to cover the inner surface you just have to be patient and wait for gravity to draw the paint down around the bottle.

2

3

Then allow the bottles to drain and fully dry for around 12 hours or so.

4

Then fill them with beautiful flowers!!

7

6

5

All my love,

God Bless,

Mims

xXx


Hello September!

Well can you believe it’s September already! Where is this year going?! It’s crazy how time flies and before you know it this is my 26th Blog post! I have honestly loved doing these blogs so far but to say it’s been a breeze to come up with new ideas would be a tiny bit of a lie I think! I love the creative challenge it brings each week but for some reason this week I seem to be a little creatively inept! So for this week I have taken things right back to basics. Combine a good old bit of wax candles and watercolour paints and you have a little super simple craft that takes me right back to my childhood.

5

First you gather some water colour paper using a wax candle like a pen, create a design on the paper.

1

Then using the watercolours paint over the page and gradually watch your picture come to life!

2

I love the way the wax repels the water colour.

3

I hope you have an amazing start to September!

4

All my love, 6

God Bless,

Mims

xXx

Happy Hair Ties!

Happy Friday Everyone! I hope you’ve all had a lovely week! I have been busy blogging and packing today as a couple of friends and I are off for a little weekend trip to Bournemouth this evening. I have never been a light packer, (I inherit that from my mother!), and this occasion is no different! Whoops!

So this weeks blog craft is how to make these adorable hair ties! They are super cute and really easy to make.

First up, all you’ll need is some elastic, a needle and thread and some pretty fabric.

1

I then cut the elastic to around 17cm long, and the fabric approx. 30cm long and 5cm wide.

Then fold the fabric in half length ways and good sides together. I then hand sewed down the length of material.

2

Once sewn, then turn the fabric in the right way.

3

Then attach a safety pin to the end of the elastic and feed it through the middle of the material. Then sew the ends of the elastic together. After this, fold the ends of the material in and sew them together.

4

And there you have it! A super cute and comfy hair tie!

Hope you all have a lovely weekend!6

All my love,

God Bless,

Mims

xXx

Party Time!

This weekend we celebrated my Daddy’s 60 birthday! It took some convincing but Mum agreed to let us have a little party. And naturally she put me in charge of decorations. I don’t think my Dad was too up for too much pretty-fying of the garden but I might have gotten a little carried away!

2

Dad produced these adorable ‘wine’ and ‘beer’ signs that one of his friends made.

9

I made some bunting for the garden and from the food table…

12

But I decided to cheat a little for some bunting around one of the gazebos. I brought some ribbon and a few bunting packs from Tiger with pre-cut fabric triangles in. I then used some fabric glue (I used copydex) to stick the triangles onto the ribbon.

We had a lovely time celebrating!

13

Even old Mr Bear was in the party spirit!

5

And of course flowers played a big part!!

15

I hope you are all having a lovely summer!!

3

All my love,

God Bless,

Mims

xXx

A Little Bit of Summer fun!

This week has brought with it a ton of rain and grey clouds! It was like our summer just disappeared over night!! I was missing the sun and I was thinking about how I could brighten up my day when I came up with this lovely little summer craft to summer-ify your hair! Please excuse the hideous selfies! My favourite model Miss Geal was on nights!!

First of all find some lovely patterned ribbon or material flower chains and some elastic.

1

Then measure around your head, approximately 90% of the way around and cut the ribbon. Mine was 49cm. Cut a piece of elastic and using a needle and thread, sew it onto one end of the ribbon.

5

Then measure the ribbon and elastic around your head and cut and sew the other end of the elastic to the other end of the ribbon.

4

And there you have it a super simple lush way to make your summery

2look unique!


All my love,

God Bless,

Mims

xXx

A Cushion For Your Pins

Happy Friday everyone! I hope you’ve had a lovely week. This week I have been working on some sewing projects and apparently being a little messy and dweeb-like as I keep pricking my fingers or stepping on pins I’ve left on the floor! Whoops! Anyway it got me thinking about these cute little pin cushions I use to make and thought i’d make them for this weeks tutorial.

1

First up, cut a circle of any of your favourite fabric. I made mine the size of a small plate.

2

Then using a simple running stitch I sewed around the edge of the circle before pulling the remaining thread and gathering the edges together.

3

I then stuffed the centre with stuffing before fully gathering the thread and sewing the edges together to close.

4

To hide the gathering I used a thread spool to draw around on some felt before cutting out a circle. I then sewed the felt circle over the gathering to make it look nice a neat and pretty!

5

And there you have it! A super simple way to protect you fingers and toes from your pins! Plus they look adorably cute too!

6

All my love,

God Bless,

Mims

xXx

Tidy Tidy Tidy!

I have been having a good old clear out this week. It was well overdue and honestly it’s made me realise how much stuff I have acquired over the years! I have made a pile of bits for the charity shop, bits for my mum and sister (don’t think my dad would appreciate my old stuff!) and then I found a t-shirt that I use to love but It had gotten a little out of shape. So I decided to make it into a cushion! As you do! Here is how I got on.

First up I used fabric scissors to cut along the neck line, and to also cut approximately 9cm up each side of the bottom of the t-shirt.

1

Then along the bottom of the back of the t-shirt I sewed 3 buttons, repeating the same process along the top seam of the back of the t-shirt.

2

On the opposite side I then made small cuts into the fabric ensuring that they lined up with the buttons, approximately half of the width of the button (as the material was quite stretchy), to act as the button holes.

3

I then fed the t-shirt over a cushion inner and did the buttons up. To close the corners, I tied the ends together in a loose knot.

4

And there you have it! A super simple and easy way to hang onto your favourite old t-shirt designs!! And a free way to create some new scatter cushions.

6

All my love,


God Bless,

Mims

xXx

5

A Little Bit of Sparkle

So this week I have been struggling on the inspiration front so I decided to have a mini sort through some of my craft supplies to see if that would inspire me! I stumbled across some wooden letters I’d brought ages ago with a view to making presents for my friends. As I got creative today I found myself thinking how versatile this very simple craft could be. They’d be great for a wedding display or for a kids bedroom or even your own book case decoration. So here is all you need to know about how I decorated these letters. Hope you enjoy!

I brought these letters for £1.99 each off of Etsy, but you can also get them in Hobbycraft. Then you need to decide on how you want to decorate them. You can use ink, glitter, paint, buttons, gems, paper, fabric paper… the list is endless!

1

I decided to initially paint mine.

2

3

Once painted I then decided to cover the ‘&’ sign in glitter – as I’m a little obsessed with glitter! I mean all the cool kids are right?! I smothered the front side of the sign with Copydex glue before pouring some silver glitter over it and letting it dry. For the other letters I used some paper flower embellishments to create a lovely, simple and girlie display!

4

And it really is that simple!! I also made a H out of map paper which looks great next to my Heidi Swapp light box and decorated an E with buttons, but more about that project a little nearer to Christmas!!

5

All my love,6

God Bless,

Mims

xXx